A Tutorial That Will Make You Look Like a Caning Genius
Darling, let me ask you something: have you ever seen a piece of jewelry so striking that you immediately wanted to know how it was made? Well, today you're going to learn how to create exactly that kind of "how did they DO that?" magic.
Those gorgeous swirled star beads you've been admiring? The ones that look impossibly complex and intimidatingly professional? Honey, I'm about to let you in on a delicious secret: they're actually surprisingly achievable, even if you're not a polymer clay wizard. Yet.
The Hook: What We're Making
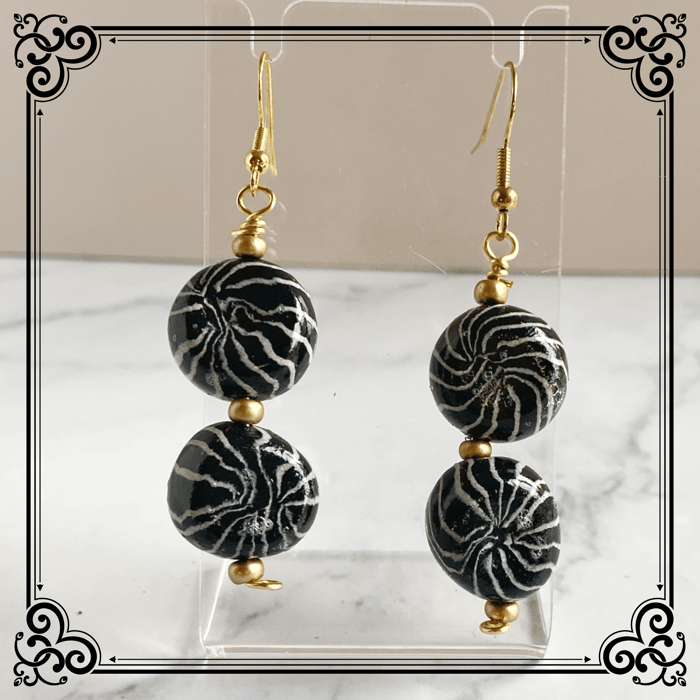
Picture this: elegant black beads with dramatic white swirls that spiral like tiny galaxies, each one absolutely unique yet perfectly coordinated. These aren't your grandmother's craft project beads - these are statement pieces that will have people stopping you on the street to ask where you bought them. And when you casually mention you made them yourself? Well, darling, prepare for some serious jaw-dropping.

I'm going to show you exactly how to create these show-stopping beauties using a technique that transforms simple striped clay into something that looks like it should cost a fortune at an artisan boutique. The best part? Once you master this method, you can adapt it to any color combination your heart desires.
What Makes This Technique So Special
The magic lies in high contrast, my dear. While you could certainly make these beads in any color combination, the real drama comes from choosing colors that are complete opposites on the spectrum. Black and white, deep purple and cream, forest green and silver - the greater the contrast, the more your finished beads will make people's eyes pop.
Don't even think about using colors that are too similar. Sage green and olive? Please. Navy and royal blue? Absolutely not. We're going for impact here, not subtlety. Save the subtle for your meditation practice; we're making jewelry that demands attention.
Gathering Your Supplies: The Star-Making Arsenal
Before we dive into the fun stuff, let's talk about what you'll need. The beauty of this technique is that it doesn't require a fortune in specialized tools - though if you're serious about polymer clay, you probably have most of these already.
Essential Materials:
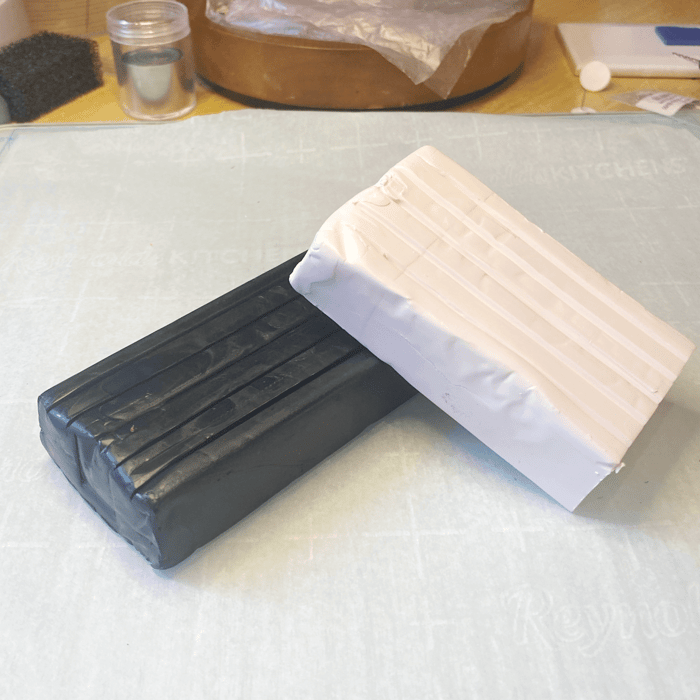
Polymer clay in two highly contrasting colors (I'm using classic black and white)
Sharp craft knife or blade
Rolling tool or pasta machine dedicated to clay work
Scrap clay for the foundation (any color - it won't show)
Clay extruder or garlic press for creating thin strips
Ruler for measuring
Bead pins or thin skewers
Baking tray with tent setup
The Pasta Machine Conversation: If you're new to polymer clay and wondering about that pasta machine, yes, you need one, and no, you can't use it for actual pasta ever again. Clay has a way of getting into every nook and cranny, and nobody wants polymer clay residue in their fettuccine. Consider it a one-way ticket to the craft room.
Step 1: Creating Your Clay Foundation
Start with your contrasting clay colors properly conditioned. I'm working with classic black and white because, frankly, it's impossible to go wrong with this combination. Stack your colors and get them ready for action.
Now, here's where we build the foundation that will become your gorgeous beads. Take a chunk of scrap clay - this is where all those random leftover bits finally earn their keep. Form it into a short, squat barrel shape. Don't stress about perfection here; this is purely functional and won't be visible in your finished piece.
Pro tip: The size of your barrel determines how many beads you'll get and how large they'll be. Make it too small and you'll be squinting at tiny beads all afternoon. Too large and you'll be wrestling with a clay monster. Aim for something about the size of a small toilet paper roll.
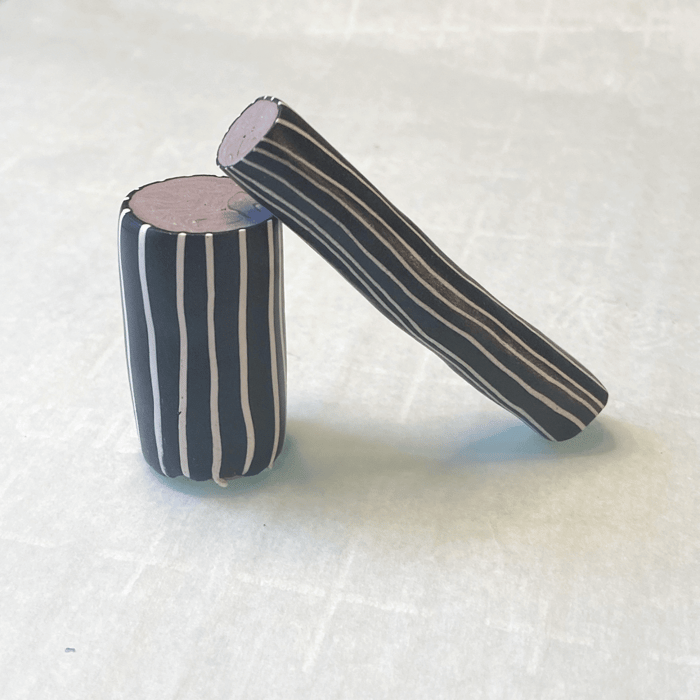
Step 2: The Wrap Job
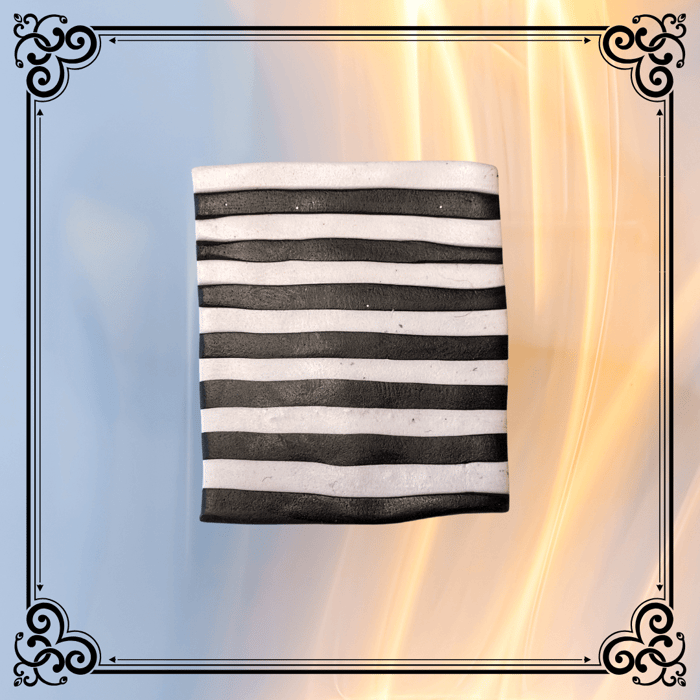
Roll out your background color (in my case, the black) to a thin, even sheet. I use setting #4 on my pasta machine, which gives you that perfect balance of thin enough to wrap smoothly but thick enough not to tear when you're handling it.
Wrap this sheet around your barrel form like you're gift-wrapping the world's most oddly shaped present. You'll have excess clay hanging over the edges - that's exactly what we want. Don't try to be precise here; we'll trim it in the next step.
Once wrapped, take your sharp craft knife and trim away the excess clay. You want clean, even edges that meet nicely without overlapping. This is where that sharp blade really earns its keep - dull tools will drag and tear your clay, and nobody has time for that frustration.

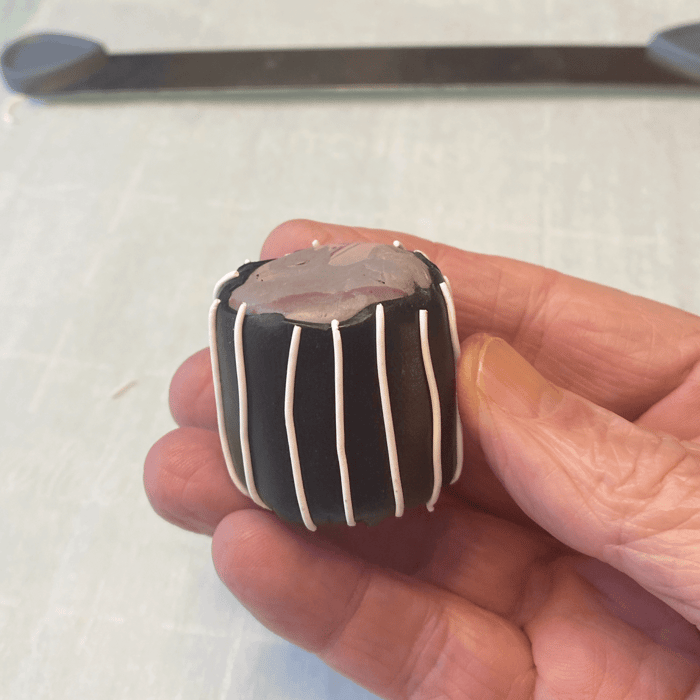
Step 3: Creating the Star Pattern Magic
Here's where the real fun begins, and where you might start feeling like a proper clay artist. Take your star color (my white clay) and run it through a clay extruder to create very thin, spaghetti-like strings. If you don't have an extruder, a garlic press works beautifully - just make sure it's dedicated to clay use only.
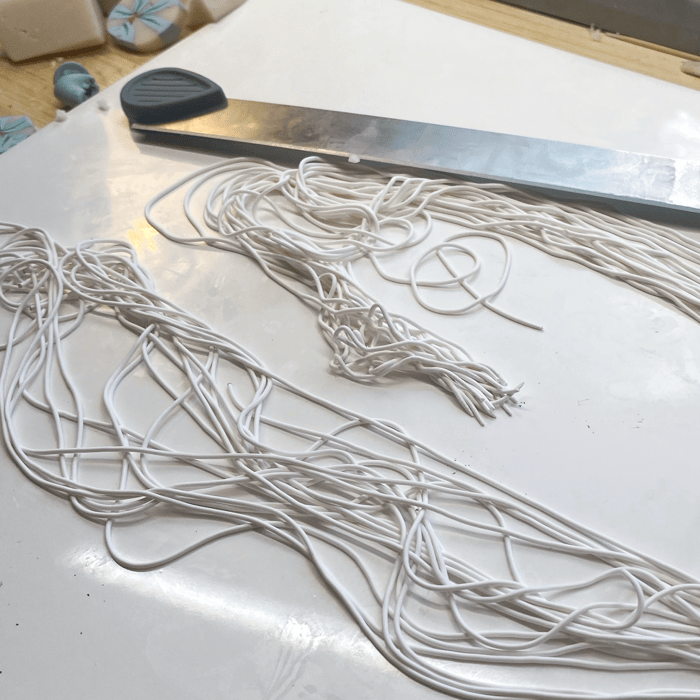
Important note: What you see in my photos is way more extruded clay than you'll actually need. I got a little enthusiastic with the extruder, but you only need enough for about 8-10 strips around your barrel. Better to make a little extra than to run short, but don't go completely overboard like I did.
Now comes the strategic part: applying these strips to your wrapped barrel. Space them evenly around the circumference, but here's the crucial bit - don't place them too close together.
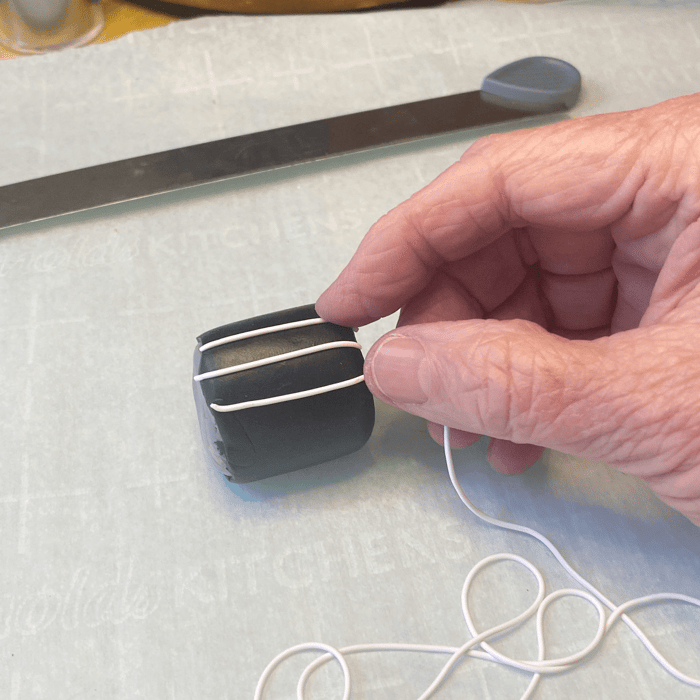
Remember, we're going to reduce this cane, which means everything will compress and get smaller. Strips that seem perfectly spaced now might merge into one thick blob after reduction. Trust me on this; I've made this mistake so you don't have to.
Step 4: The Reduction Process (Where Magic Happens)
Once your barrel is beautifully striped, it's time for the reduction process. This is where your thick, clunky barrel transforms into something elegant and manageable.
Working from the center outward, gently squeeze and roll your barrel to reduce its diameter. You'll see those stripes getting thinner and closer together as you work. The key word here is "gently" - polymer clay responds much better to patient persuasion than aggressive force.
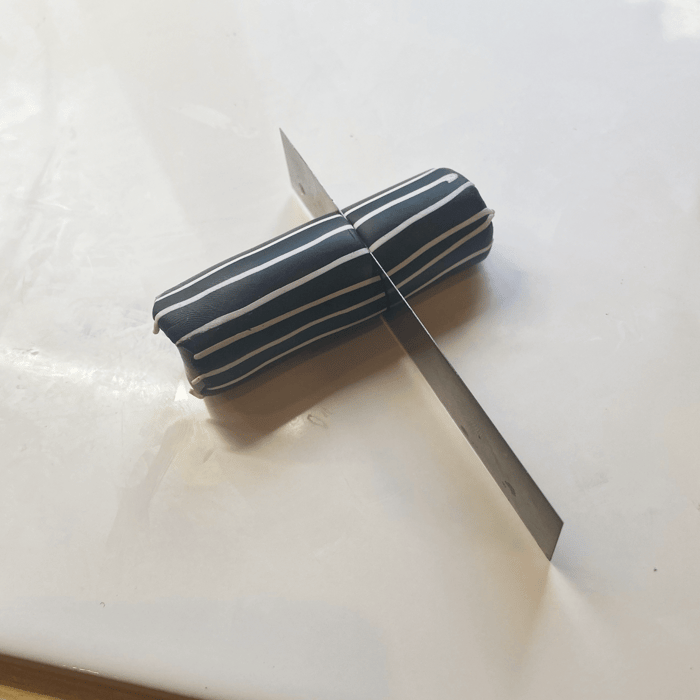
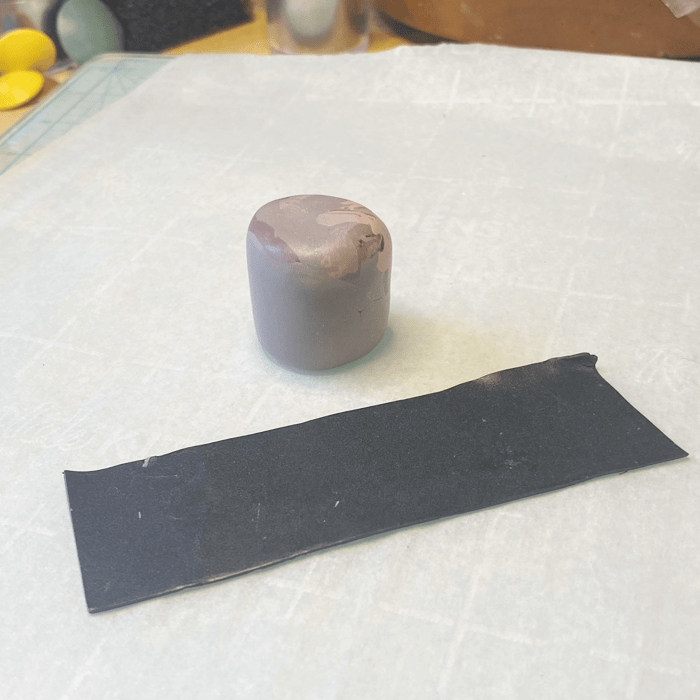
Smart strategy alert: Because you're working with a fairly large barrel, don't try to reduce the whole thing at once. Slice off about a third of your barrel to work with now, and save the rest for later projects. The shorter piece is easier to handle, stores better, and gives you multiple opportunities to experiment with different bead sizes.
Keep reducing until your cane is about the diameter you see in my photos with the ruler - roughly fat pencil thickness or slightly larger. At this point, you can slice your working piece into four equal sections (or however many beads you want to make).
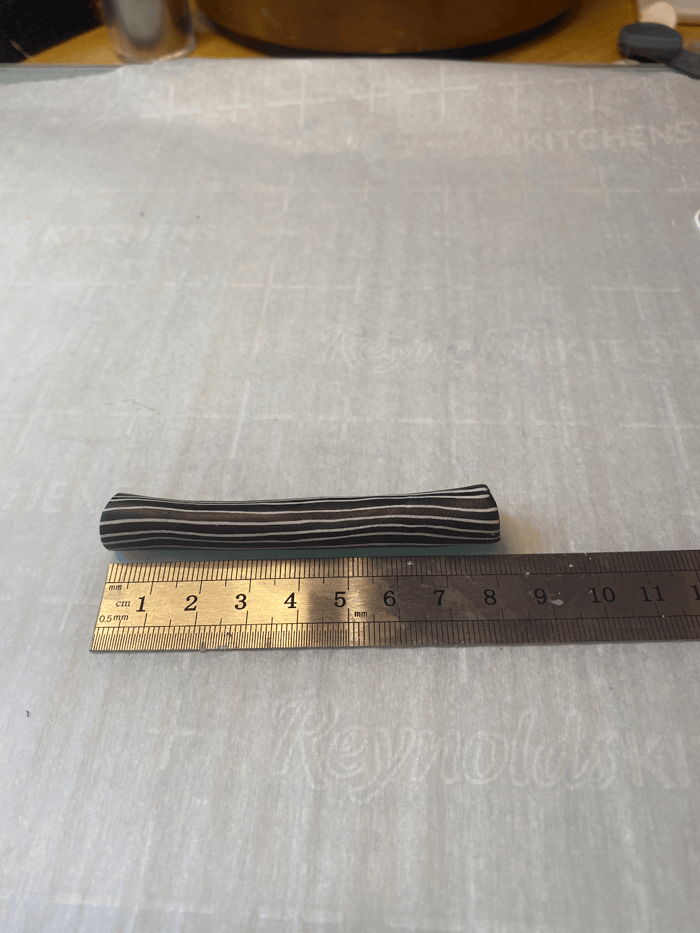
Size variation tip: Want to create a graduated set of beads? Cut your sections in different lengths. Longer pieces make bigger beads, shorter pieces make smaller ones. A graduated set looks absolutely stunning in earrings or necklaces.
Step 5: The Impossible-Seeming Transformation
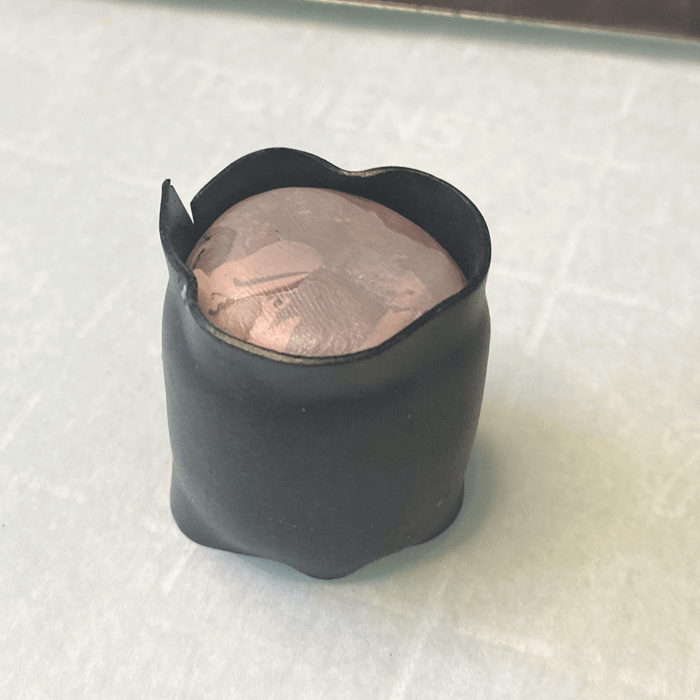
Here's where I usually lose people because it sounds completely impossible until you see it happen. Take one of your little striped logs and, using just your fingers, coax the black clay from the ends over the exposed scrap clay until the two sides meet in the center.
I know, I know - it sounds like trying to turn a hot dog into a sphere. But polymer clay is remarkably cooperative once you understand how it behaves. The black clay will stretch and cover more than you think it will.
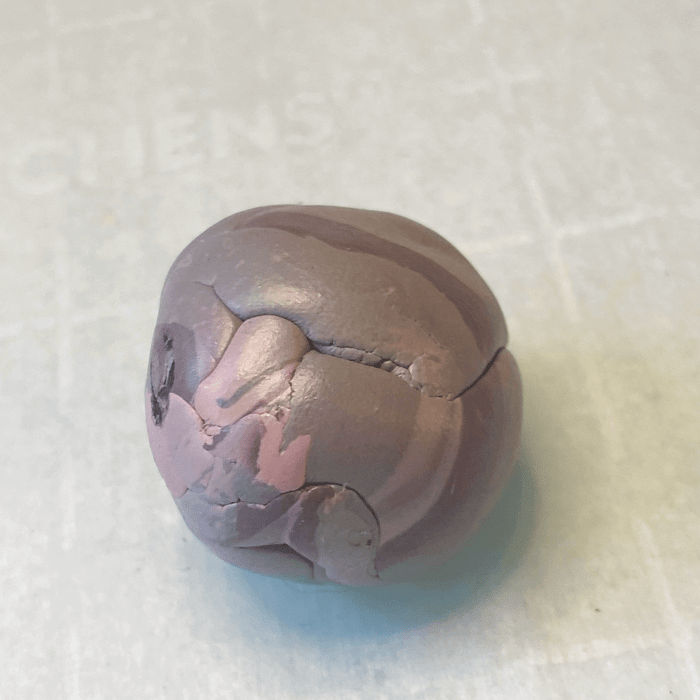
Once both ends are covered and the scrap clay is no longer visible, place this little covered log in the center of your palm. Now roll it between your palms to form a ball. Watch here!
The lumpy stage: At first, this will feel weird and lumpy and completely wrong. The log shape will resist becoming spherical, and you might think you've ruined everything. Keep going! This is completely normal. The clay needs time to redistribute and find its new shape.
Keep rolling gently until you have a smooth, round bead. The stripes will have transformed into those gorgeous swirled patterns, and suddenly you'll have something that looks like you paid serious money for it at an artisan fair.
Step 6: Preparing for the Oven
Before baking, you need to create holes for stringing your beads. Using bead pins or thin skewers, carefully pierce through what you determine is the center of each bead. The goal is to go from edge to edge through the middle - this will give you the most attractive hang when the beads are strung.
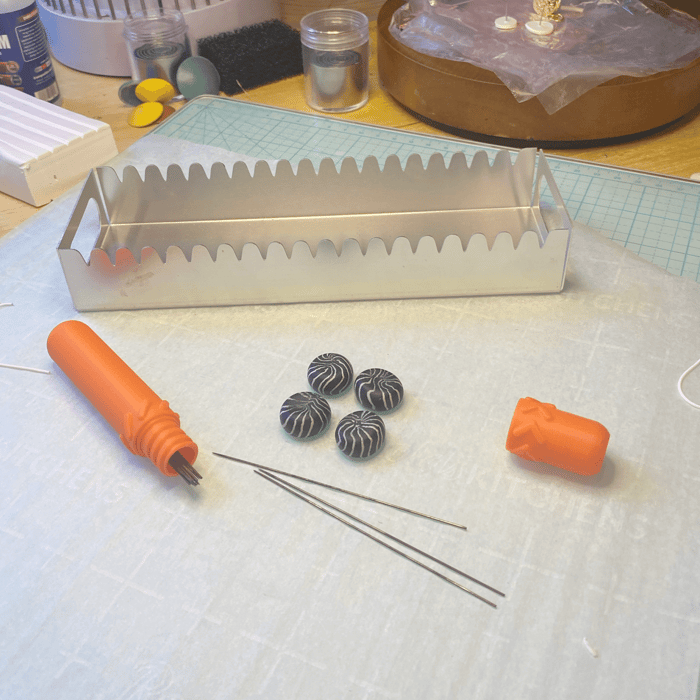
Baking setup: This is where that tray comes in handy. You want to suspend your beads so they don't develop flat spots or hot spots during baking. Add a tent of foil over this tray. The tent arrangement allows heat to circulate evenly around each bead.
Bake according to your clay manufacturer's instructions - usually around 275°F for about 30 minutes, but check your specific brand's recommendations.
Assembly Options: Making It Your Own
Once your beads are baked and cooled, you have delicious options for turning them into finished jewelry.
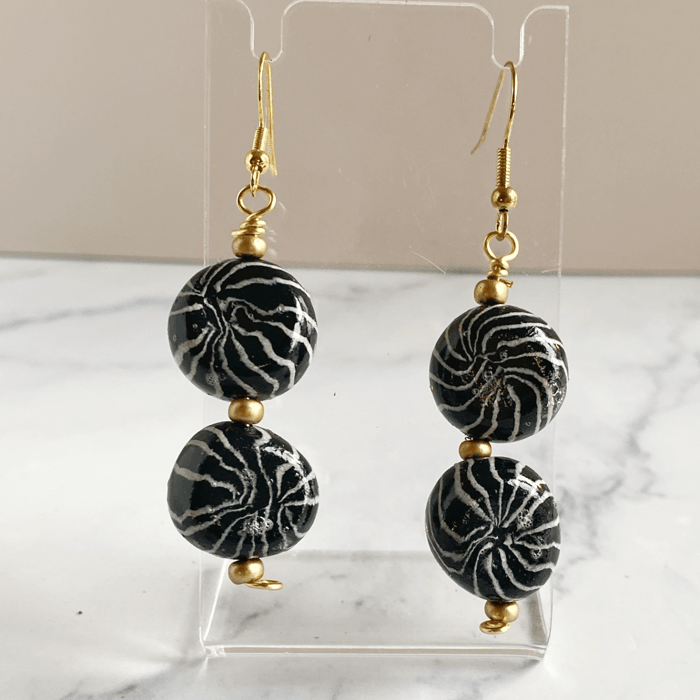
Single bead earrings: Use head pins to attach one bead directly to ear wires. This creates a clean, simple look that lets the bead's pattern be the star.
Multi-bead designs: Like the earrings shown in my opening photo, you can combine two beads per earring with small spacer beads. This creates more movement and visual interest.
Color combination ideas: Now that you understand the technique, experiment with different high-contrast combinations:
Deep purple and cream
Forest green and silver
Burgundy and gold
Navy and white
Why This Technique Works So Well
The genius of this method lies in its forgiving nature. Unlike some polymer clay techniques that require precision timing or exact measurements, this approach actually benefits from a little irregularity. Each bead will be slightly different, which adds to their handmade charm.
The reduction process is almost foolproof - as long as you work gently and patiently, you'll get beautiful results. And if you make a mistake? Simply smush it back together and start over. Polymer clay is wonderfully forgiving that way.
Troubleshooting Common Issues
Stripes merged during reduction: Next time, space them farther apart before reducing. Better to start with fewer, well-spaced stripes than to end up with muddy blobs.
Bead won't roll smooth: Keep working at it - sometimes the clay just needs more time to redistribute. If it's really fighting you, let it rest for a few minutes and try again.
Colors look muddy: This usually means your contrast wasn't strong enough, or you overworked the clay during rolling. Stick to high-contrast combinations and work with confidence rather than constantly fiddling.
The Satisfaction Factor
There's something deeply satisfying about creating something this beautiful from such simple materials. These beads have that perfect combination of looking complex while being actually achievable, which makes them ideal for impressing both yourself and others.
Plus, once you master this basic technique, you can adapt it endlessly. Different color combinations, varying bead sizes, even incorporating metallic accents - the possibilities are deliciously endless.
So go ahead, darling. Create something gorgeous. Make people wonder how you did it. And when they ask for your secret? Well, that's entirely up to you whether you share it or just smile mysteriously.
After all, a little mystery never hurt anyone's artistic reputation.