Darlings, My First 10 Days of Bead-azzlement: A Polymer Clay Odyssey!
Oh my dears, what a GLORIOUS adventure I've embarked upon! When my quilting friend Cassandra Beaver (who creates beauty that would make even the angels swoon) started her annual 100-day creative soiree, I simply had to join the revelry! And when those polymer clay wizards at The Blue Bottle Tree announced their own 100-day extravaganza, I thought, "Mame, this is your moment to shine, or rather, to BEAD!"
And so begins my first—but certainly not my last—100-Day Project!
BEADS! Oh, the sheer joy of their delicious roundness! Even cylinders and cones have a certain rotund quality that's simply irresistible. There's something downright metaphysical about creating perfect little spheres with one's own hands, don't you think?
For 100 days, I've committed to crafting at least one bead daily. What liberation this commitment brings! I'm free to be absolutely OUTRAGEOUS, to attempt techniques I might have previously dismissed as "too difficult" or "too pedestrian." (As if anything creative could ever be too pedestrian—what nonsense!)
I'm positively BURSTING to share with you the unbridled fun I'm having and the pearls of wisdom I'm stringing together along the way! (Pearls of wisdom—get it? Oh, I do crack myself up!)
Now, let me bead perfectly honest about these first ten days...
Day 1: Veneer? Oh My Dear!
For my inaugural bead-venture, I created what I call my "Something Old, Something New" masterpiece! I started with a medium-sized bead formed from—wait for it—SCRAP CLAY! Yes, darlings, even in the world of polymer clay, recycling is all the rage!
Once I had shaped my base bead to perfection (round as the full moon over Manhattan!), I sliced whisper-thin veneers from a previously-made cane. Think of it as giving my plain Jane bead a couture makeover! I lovingly applied these delicate slices to cover the entire surface, transforming trash to treasure faster than you can say "polymer prestidigitation!"
What I Learned: A beautiful cane sliced thinner than a socialite's patience can turn humble scrap clay into something absolutely FABULOUS! Who knew redemption could be so colorful? It's like putting Chanel over cotton, my sweets—sometimes the covering makes ALL the difference!
Day 2: Imperfection Perfection!
Oh my DARLINGS, day two brought another veneered vision—but with a twist that had me positively GIDDY!
While yesterday I was cautious as a cat on a wet windowsill, today I threw CAUTION to the WIND! I placed my cane slices with what one might generously call "artistic abandon"—overlapping here, gapping there, precision nowhere! A SCANDAL in traditional crafting circles!
But then came the MAGIC moment! With nothing but the gentle warmth of my palms and a rolling motion that would make Fred Astaire envious, those haphazard slices melded together like old friends at a cocktail party! The imperfections disappeared faster than canapés at my last soirée!
What I Learned: Imprecision can be your ALLY, not your enemy! Those overlapping cane slices, once given the palm-rolling treatment, blend into a harmonious whole that's simply DIVINE! It's like life, my treasures—a little messiness often creates the most interesting patterns! As I always say, "Perfect is BORING, but perfectly imperfect is ART!"

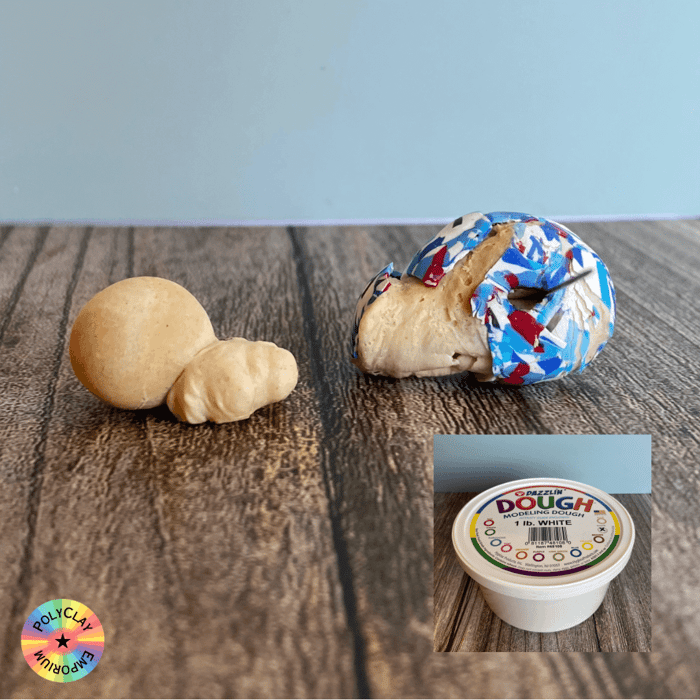
Day 3: The Great Hollow Hope (and Bubble Burst!)
LIVE AND LEARN, my dears! Day three found me with GRAND AMBITIONS of hollow beads dancing in my head. After all, why should beads be solid when they could be delightfully VOID in the middle? Economy of materials! Lightness of wear! REVOLUTIONARY thinking!
For this experiment, I turned to water-soluble modeling clay as my sacrificial inner core—the theory being utterly BRILLIANT, if I do say so myself! Shape the modeling clay into a sphere, cover with polymer, bake, then VOILÀ! A long soak in water and the center would dissolve away like my inhibitions after a second martini!
But oh, what a SPECTACULAR failure ensued! The test blob on the left (which I affectionately named "The Blob That Ate Manhattan") morphed into something even MORE blob-like during baking, complete with a tiny bubble—as if it were laughing at my hubris!
And the full test bead? DARLINGS, it didn't just fail—it EXPLODED with the dramatic timing of a diva making an entrance! My polymer coating BURST FORTH like it was making a jailbreak, leaving me with what can only be described as a polymer clay supernova!
What I Learned: This particular modeling clay and I must agree to DISAGREE about its suitability as a hollow bead core! The joke is indeed on me—and what a HOOT it was! As Agnes de Mille once told me, "Failure isn't the opposite of success, darling—it's part of it!" The search for the perfect hollow bead continues... onward and UPWARD!
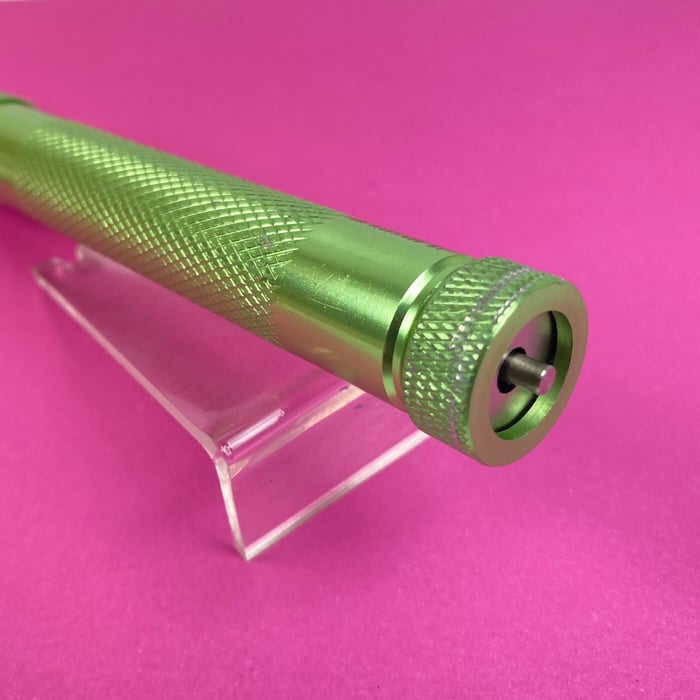
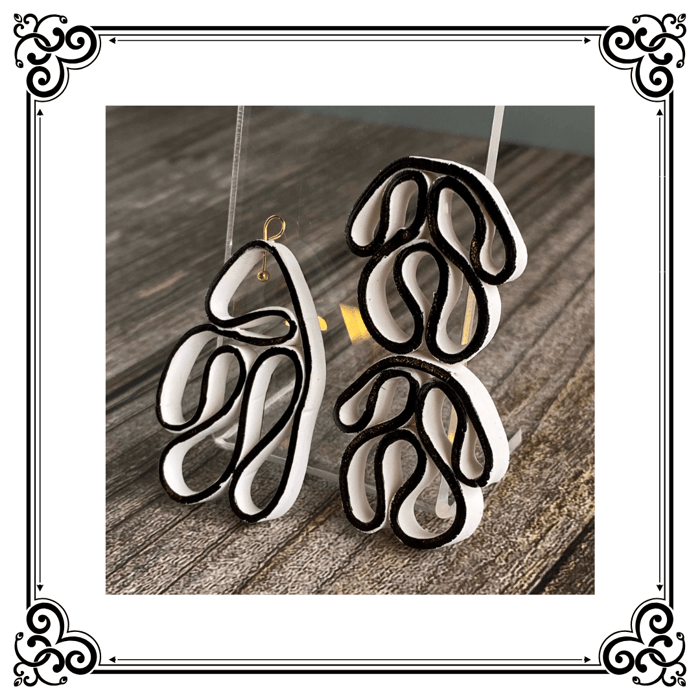
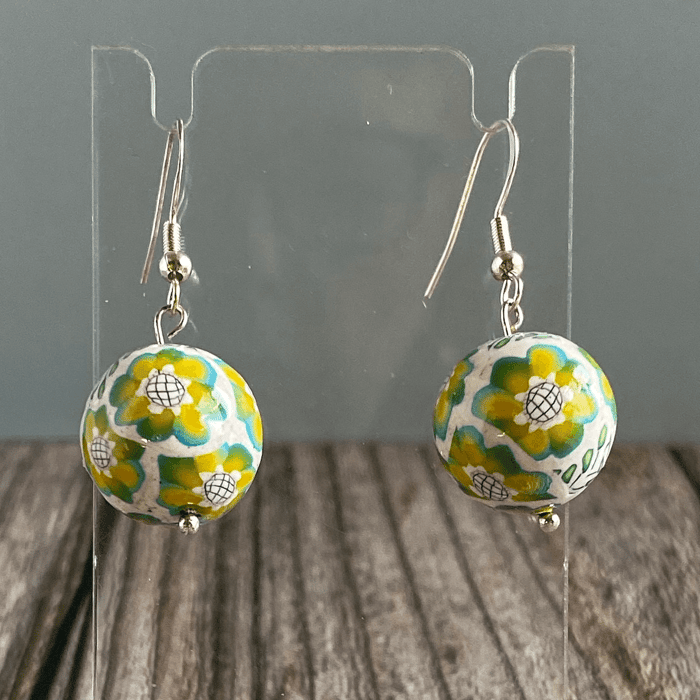
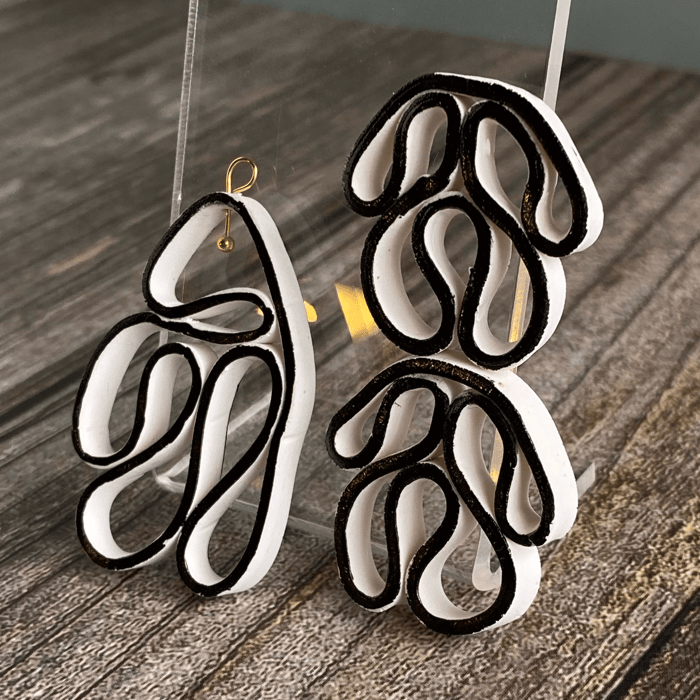
Day 4: The Swirling Ribbon Revolution!
DARLINGS, on day four I found myself in the throes of ARTISTIC ECSTASY with extruded cane ribbons! Picture this: delicate strands of polymer clay, forced through my extruder like pasta through an Italian grandmother's hands, then transformed into MESMERIZING swirls that would make the galaxy itself jealous!
The BLACK and WHITE combination—oh, be still my BEATING HEART! The contrast was so striking it practically LEAPT off the beads and performed the can-can! Meanwhile, gold edges on white (which I tried but wisely didn't photograph) had all the visual excitement of watching paint dry at a librarians' convention. Sorry, gold, but sometimes you're just not the STAR of the show!
What I Learned:
- These extruded ribbons are positively CLINGY things! With just the gentlest pressure—lighter than a socialite's air kiss—they stick to themselves like old friends reuniting!
- Creating mirror-image swirls for earrings is more CHALLENGING than getting two identical twins to wear different outfits! Symmetry, you beautiful, ELUSIVE creature!
- High contrast is the JEWELRY equivalent of a dramatic entrance! The black edges against white created more VISUAL POP than a champagne cork at midnight on New Year's Eve!
As my dear friend Coco Chanel once said (or should have said), "Before you leave the house, look in the mirror and remove one accessory." But with these beads, darling, you might just want to ADD one more!
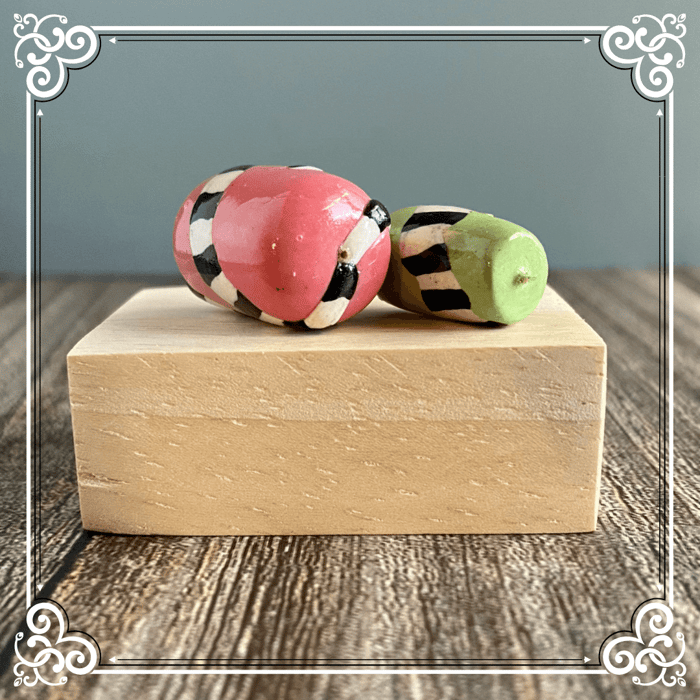
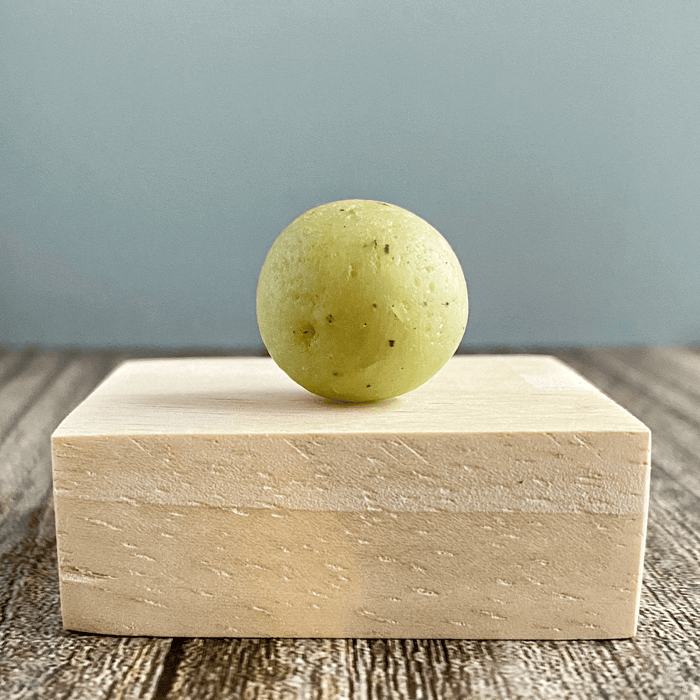
Day 5: Ancient Aspirations and Peppery Persuasions!
OH, the HEARTBREAK and the HOPE of day five, my precious ones! I set out with VISIONS of ancient pottery dancing in my head—those magnificent archaeological treasures that always make me wonder if our ancestors weren't perhaps MORE stylish than we give them credit for!
My grand scheme involved TRANSLUCENT clay (barely kissed with green) over a scrap clay core—RECYCLING again, darlings, because saving the planet never goes out of fashion! Then came my moment of CULINARY CREATIVITY: black pepper for mysterious dark speckles and TABLE SALT for those delightful white bits! I pressed salt into the surface with the enthusiasm of a seasoned chef, dreaming of the GLORIOUSLY irregular texture that would emerge once I washed it away!
But instead of the "WOW!" I anticipated, I got a resounding "meh." The clay equivalent of a blind date described as "having a nice personality"!
What I Learned: Try EVERYTHING, my dears! Failure is just success taking the scenic route! And upon further reflection (with a fresh cocktail in hand), I've decided a WHOLE NECKLACE of these subtle beauties might actually create the CUMULATIVE effect I was seeking. Sometimes it's not about the solo performer but the entire CHORUS LINE!
As my dear friend Salvador Dalí once told me while twirling his mustache, "Mistakes are almost always of a sacred nature. Never try to correct them." Though in THIS case, a little more experimentation is definitely needed! ONWARD, clay warriors!
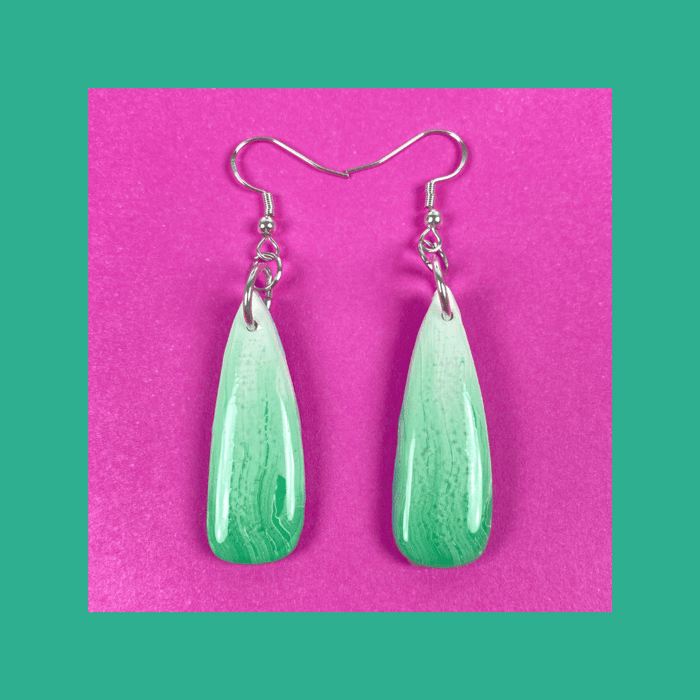
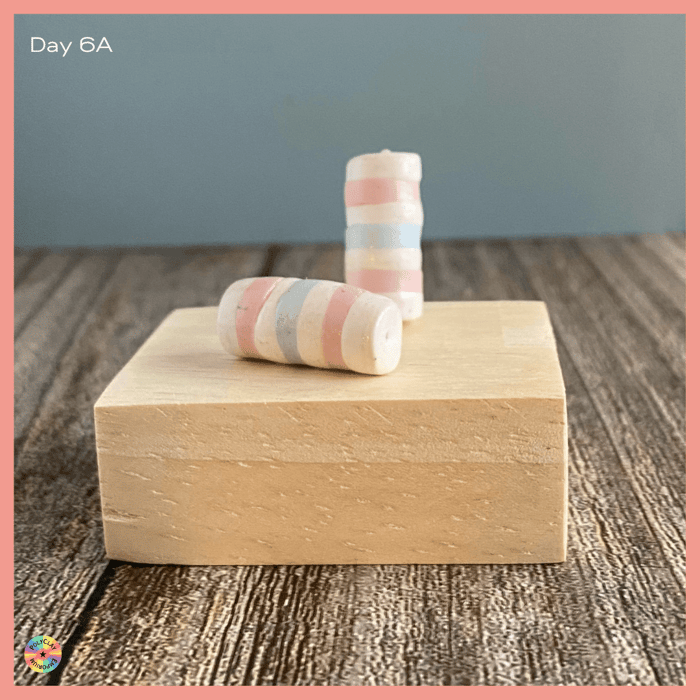
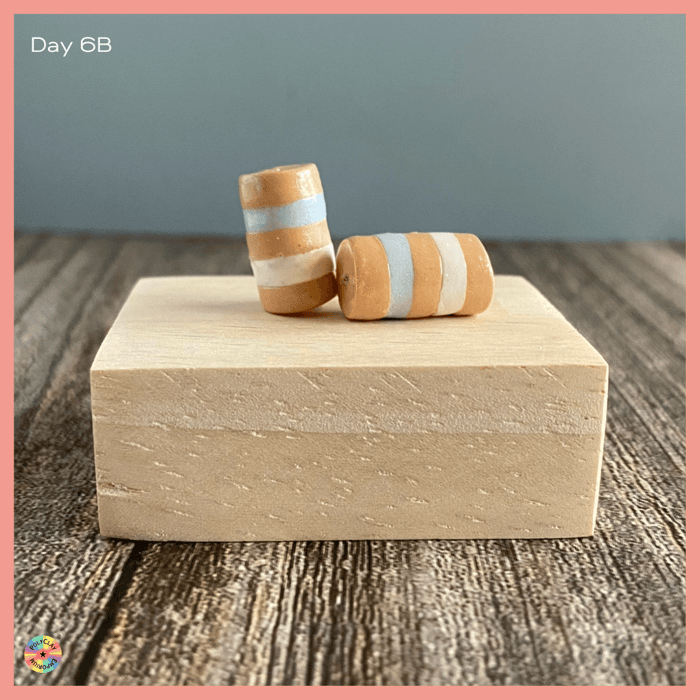
Day 6: Sweet Success in Candy-Colored Clay!
DARLINGS! Day six brought a DELICIOUS revelation that transported me straight back to childhood summers and pocketfuls of FORBIDDEN TREATS! Remember those enchanting stacks of tiny candies wrapped in cellophane? The ones that would melt together in your pocket on hot days and required SURGICAL PRECISION to unwrap? Well, I've created their SOPHISTICATED COUSIN in earring form!
These little polymer clay treasures had me positively GIDDY with nostalgia! The layered effect is simply SCRUMPTIOUS, though I'm already plotting their next incarnation with colors that CLASH and CONTRAST with the subtlety of a peacock at a funeral! And perhaps some architectural RESTRUCTURING of the stack is in order—why be conventional when one can be REVOLUTIONARY?
What I Learned: The concept has me more excited than finding vintage Schiaparelli at a garage sale! However, my inner perfectionist (yes, she exists, though I keep her sedated most days) INSISTS that next time, those circles must align with the precision of Rockettes in a kick line! These layers were all cut at thickness 0 on my Atlas pasta machine—a marvelous starting point, but I'm ITCHING to experiment with varying thicknesses for a more DRAMATIC silhouette!
As I always say, "Life is too short for boring jewelry and sensible shoes!" These candy-stack earrings are definitely heading in the FABULOUS direction!
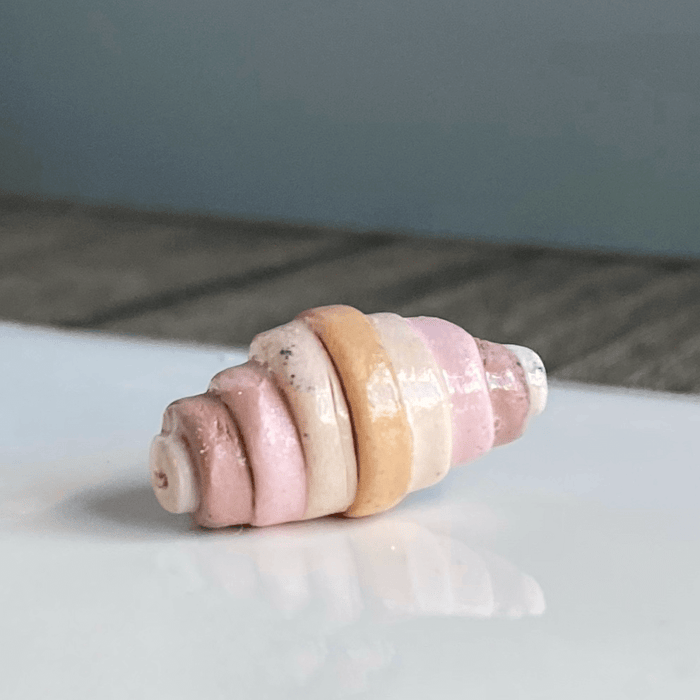
Day 7: Stepping Up My Circle Game!
DARLINGS, on day seven I took my love affair with CIRCLES to a whole new dimensional frontier! Why settle for circles of the same size when you can create a TOWER OF POLYMERIC POWER with graduating diameters? It's like the Guggenheim Museum for your EARS!
The concept has me absolutely TICKLED, but my mind is already racing ahead like a shopaholic at a sample sale—what if the steps between diameters were BOLDER? More DRAMATIC? What if each layer announced itself with the confidence of a diva taking center stage? The possibilities have me positively DIZZY with excitement!
What I Learned: While the concept deserves a standing ovation, the execution needs a bit more REHEARSAL time, my dears! And let me share a CRUCIAL bit of wisdom that separates the amateurs from the ARTISTES—keep your workspace cleaner than an operating room! Those minuscule specks of polymer clay showing up between layers are like uninvited guests at an exclusive party—TERRIBLY distracting! Some layers here look like they've been rolling around in the dust like a DEBUTANTE gone wild!
As my friend Diana Vreeland always said (or would have, had she been a polymer clay enthusiast), "A little bad taste is like a nice splash of paprika. No taste is what I'm against." But clay specks, darlings? Those we can definitely do without! ONWARDS to cleaner creations and BOLDER diameter differences!
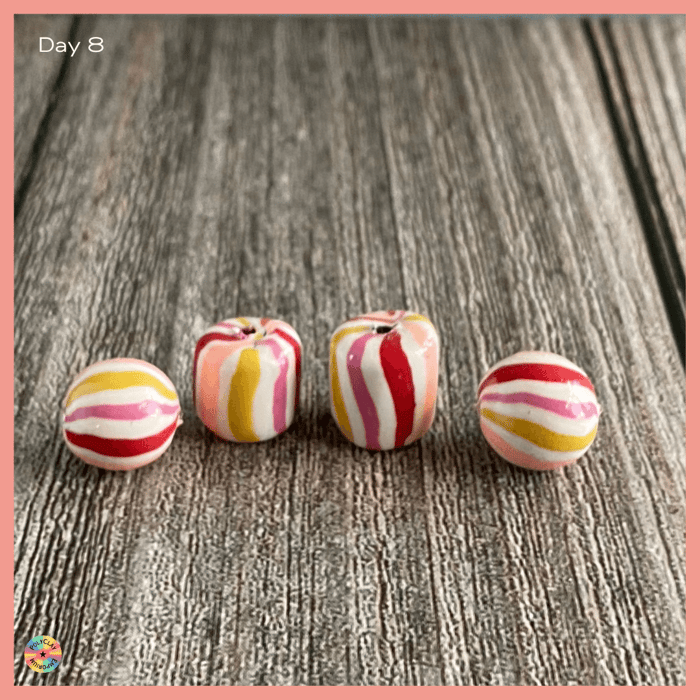
Day 8: Stripes of Splendor!
DARLINGS! Day eight had me channeling my inner ZEBRA with the most GLORIOUS striped polymer clay beads, courtesy of Kaori Studio's brilliant tutorial! These vibrant warm hues have me feeling positively TROPICAL—like I'm lounging on a beach in Acapulco with a cocktail that has more fruit than liquid!
The STRIPES! Oh, the STRIPES! They're perfectly aligned like chorus girls at the Folies Bergère! These bright, warm colors make my heart sing louder than an opera diva with something to prove! There's something so DELICIOUSLY rebellious about stripes—they refuse to blend in, insist on standing out, and make no apologies for their boldness. In short, they're everything I aspire to be!
What I Learned: Who would have thought that reducing a cane to precisely the thickness of your desired bead would allow you to produce MULTIPLE, nearly IDENTICAL little treasures? It's like discovering you can clone your favorite piece of jewelry! The EFFICIENCY! The CONSISTENCY! The sheer GENIUS of it all!
It's as if I've discovered the polymer clay equivalent of having twins—but without the midnight feedings! This technique is so marvelously CLEVER it makes me want to throw a party just to celebrate it! As I always say, "Why make one fabulous thing when you can make SEVERAL?"
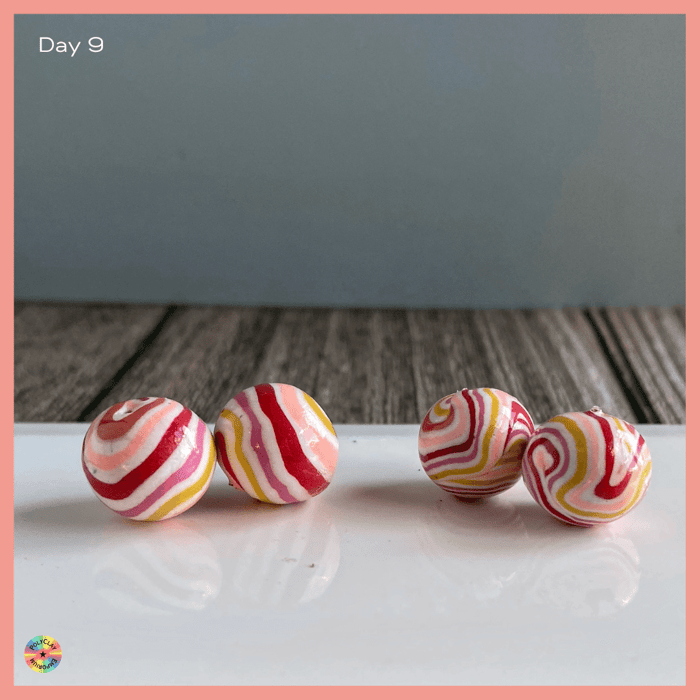
Day 9: Spirals Gone Wild!
DARLINGS! On day nine I took those Kaori Studio stripey beads and gave them a TWIST—quite literally! I swirled and SWIRLED until the clay practically begged for mercy!
What emerged was nothing short of a PSYCHEDELIC MIRACLE! Those neat, orderly stripes transformed into spiral patterns that would make the Milky Galaxy blush with envy! It's like taking a perfectly respectable pattern to a WILD PARTY and watching it dance on tables by midnight!
The results are simply HYPNOTIC—I find myself staring at these beads like they're crystal balls revealing the secrets of the universe (or at the very least, tomorrow's lottery numbers)! These spirals have more personality than most people I've met at charity galas!
What I Learned: Oh, the REVELATIONS of a good swirl! Those predictable stripes, when given the freedom to TWIST and TURN, create the most MAGNIFICENT spiral patterns imaginable! It's like watching wallflowers transform into dance champions—who knew they had it in them?
This technique is absolutely ADDICTIVE—more intoxicating than champagne at noon! As my dear friend Salvador Dalí might have said, "Intelligence without spirals is the bird without wings." Or something equally profound. The point is, my sweets, these swirly beads have me absolutely SPINNING with joy!
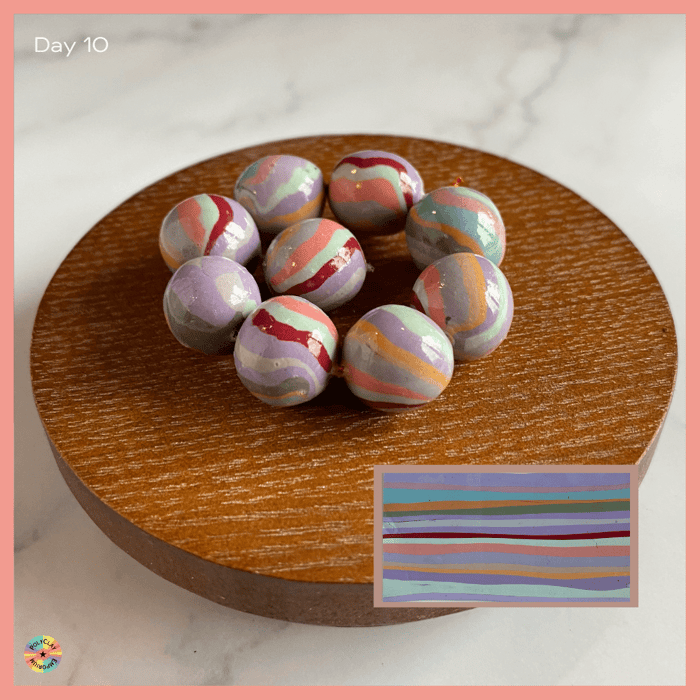
Day 10: Waste Not, Want Not, WOW!
DARLINGS! For our grand finale of this ten-day bead-tastic polymer clay adventure, I embraced the ultimate RECYCLING TRIUMPH! That gorgeous slab of clay languishing from a previous project? RESCUED and REPURPOSED into the most DELECTABLE striped beads!
Just LOOK at that COLOR PALETTE! It's like a tropical sunset had a love affair with a box of gourmet jellybeans! These vibrant stripes make me so unabashedly HAPPY I could practically dance the Charleston right here in my studio! (And between us, I might have done exactly that!)
What I Learned: Another BRILLIANT method revealed itself today—start with a base cylinder, wrap it lovingly in your designed clay pattern like it's wearing a couture gown, then reduce it down and VOILÀ! You've created not just ONE fabulous bead but an ENTIRE MATCHING SET! It's like having sextuplets without the diaper expenses!
This technique is the gift that keeps on GIVING! One moment you have scraps destined for the polymer clay retirement home, and the next you're creating an entire FAMILY of coordinated beads that could grace the neck of royalty! (Or at least the neck of someone with EXCEPTIONAL taste!)
As I always proclaim while raising my cocktail glass at sunset, "The best things in life come from creative REUSE and generous applications of COLOR!" These beads don't just make me happy—they make me ECSTATIC! And isn't that precisely what art should do, my precious ones?
The Journey Continues!
Well, my DARLINGS, what a SPECTACULAR whirlwind these first ten days have been! From veneer-covered treasures to exploding hollow experiments, from candy-stack nostalgia to hypnotic swirls that could mesmerize even the most jaded jewelry connoisseur! Each bead has been a tiny ADVENTURE in clay, teaching me lessons both GLORIOUS and occasionally HUMBLING! But this is merely the appetizer before the feast, my precious ones! There are NINE more delicious 10-day installments coming your way as this 100-day project unfolds like the most fabulous butterfly emerging from its chrysalis! So keep your eyes PEELED and your clay CONDITIONED as we continue this journey together through the wonderful, wild, and occasionally wacky world of polymer clay beads! As I always say, "Life's too short for boring beads!"—and we've got 90 more days to prove it!