Welcome back to my polymer clay adventure! I've officially crossed the halfway mark of my 100-day challenge (okay, I may have stretched the definition to include other polymer clay creations beyond just beads), and let me tell you—it's been quite the learning experience!
Day 51: The Deer That Wasn't
I decided to tackle that adorable little deer tutorial from the Sculpey website again, this time in a cheerful pink. Oh, how they make it look so effortless online! The reality? Well, let's just say there's no animal on earth that looks quite like my creation. But hey, practice makes progress, right?

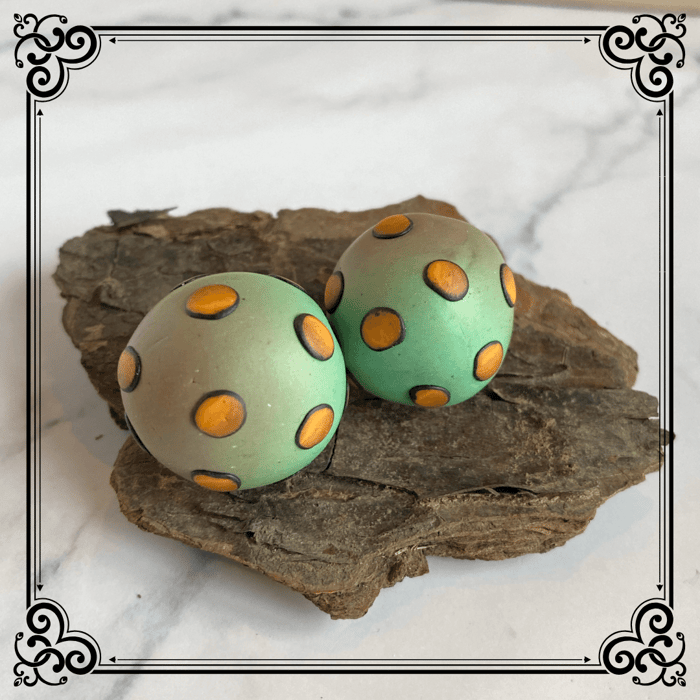
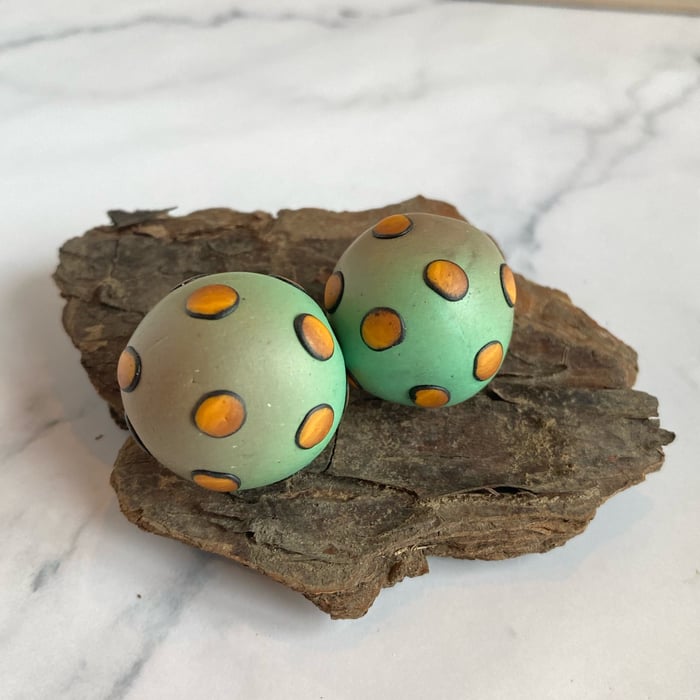
Day 52: Skinner Blend Magic
Today I created a gorgeous Skinner blend bead transitioning from green to orange—one of my favorite color combinations! The real fun came with adding the dots, which are also Skinner blends going from orange to brown, each carefully outlined in black. My technique? Random placement followed by rolling the beads in my hands to ensure everything adheres properly.
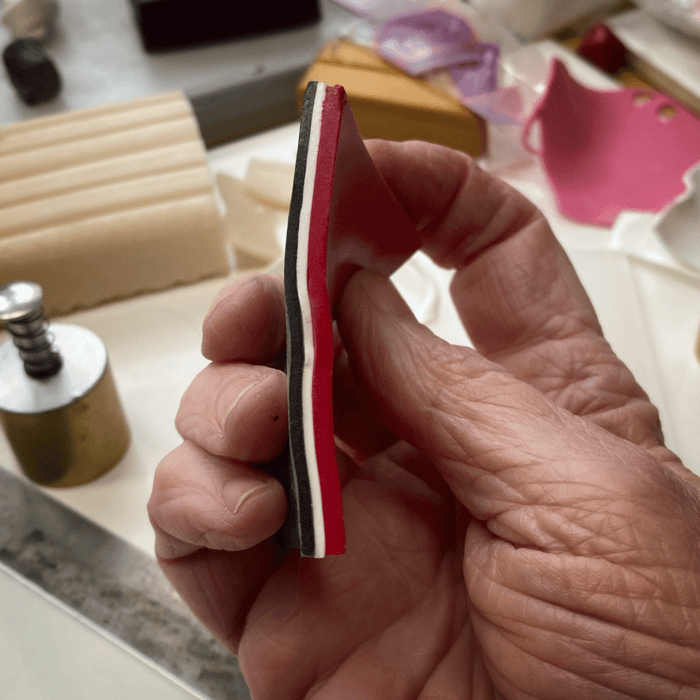
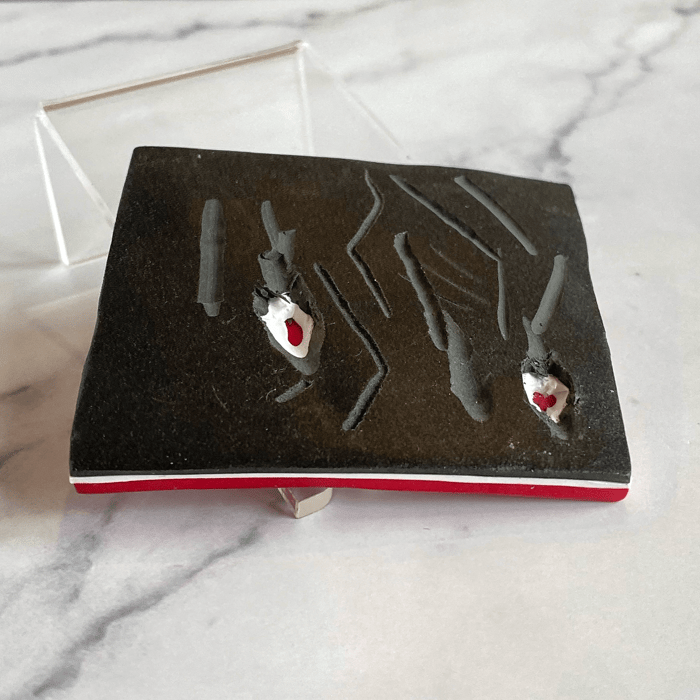
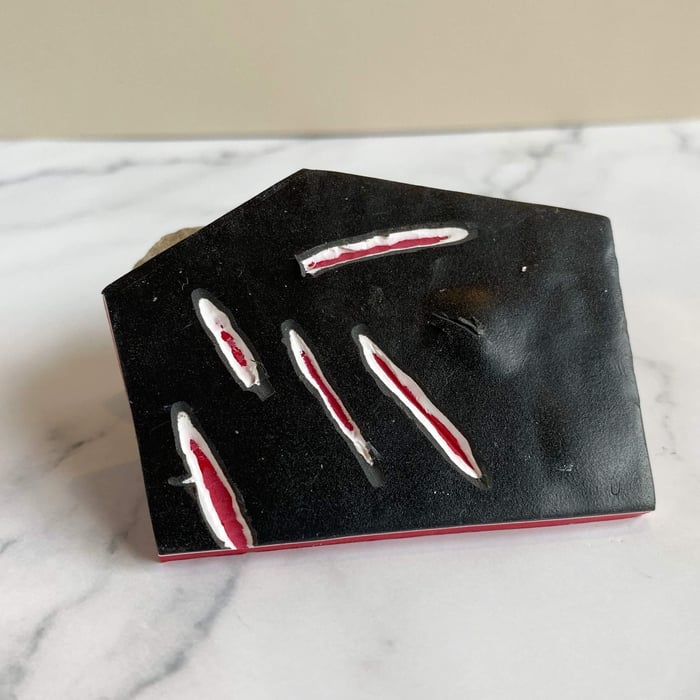
Day 53: The Carving Reality Check
Feeling ambitious, I decided to try my hand at polymer clay carving. I had visions of creating stunning layered patterns by carving through black clay to reveal beautiful white and red layers beneath. The reality? Much harder than anticipated! My tools weren't nearly sharp enough, and the baked clay was tougher than I expected. What should have been delicate, artistic cuts turned into rough gouges that required all my strength to make. Sometimes the best lessons come from spectacular failures!
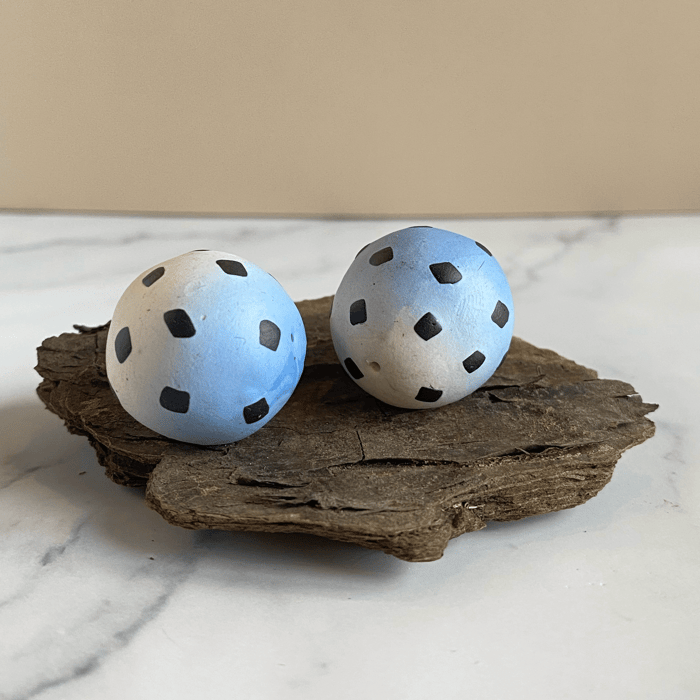
 Day 54: Disco Ball Dreams
Back to what I know works—another Skinner blend, this time transitioning from blue to white. Instead of round dots, I experimented with tiny black diamond shapes. The result? Something that reminds me of a miniature disco ball! Sometimes the best discoveries come from small variations on familiar techniques.
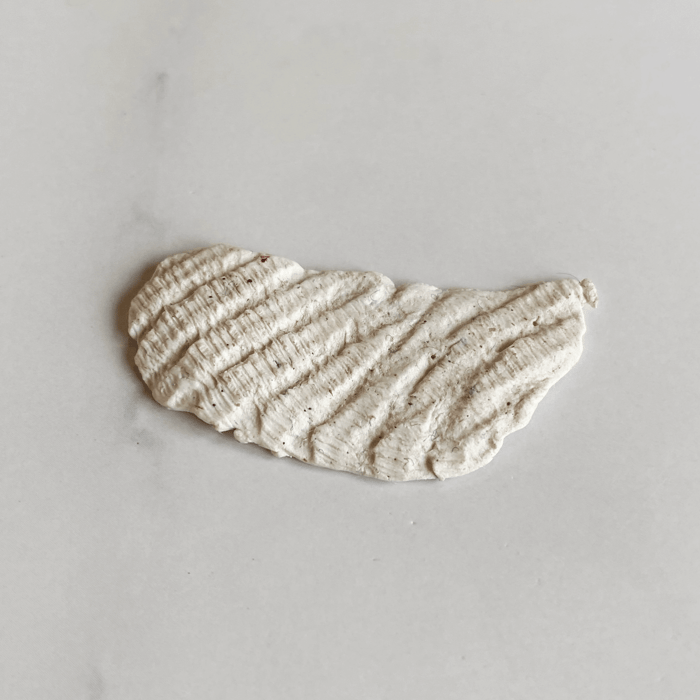
Day 55: Workshop Floor Treasure
Here's something unexpected! This beautiful piece wasn't discovered on some romantic beach walk—I literally peeled it off my workshop's indoor-outdoor carpet during a cleanup session. It had been dropped, stepped on, and forgotten for weeks. The side that was against the rug created this incredible texture that looks exactly like a weathered shell fragment. Sometimes the best art happens by accident!
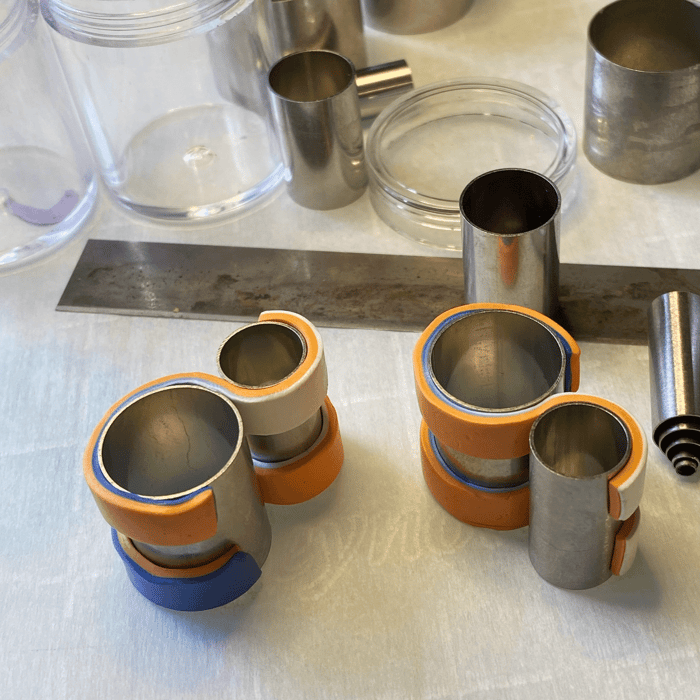
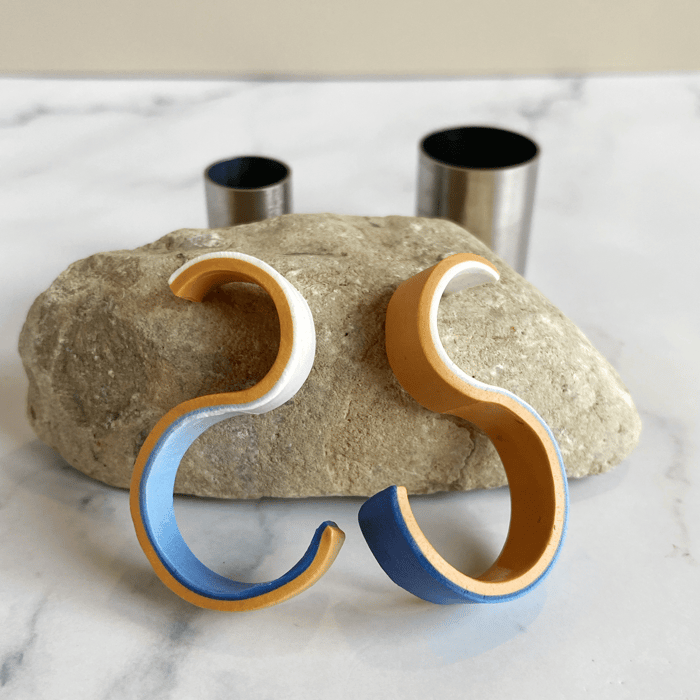
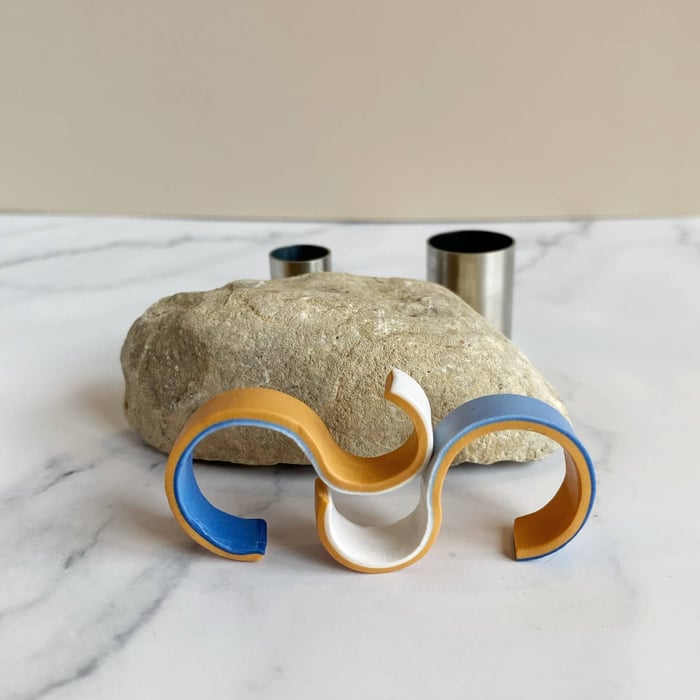
Day 56: Curves and Experiments
Today was all about proof-of-concept: creating S-curves using strips and small circular molds. I used my trusty white-to-blue Skinner blend on one side with orange on the other, winding the clay around two adjacent molds of different sizes. I'm excited to try this technique with other metal shapes, and I'm already dreaming up mirror-image polymer clay guides for more organic curves.
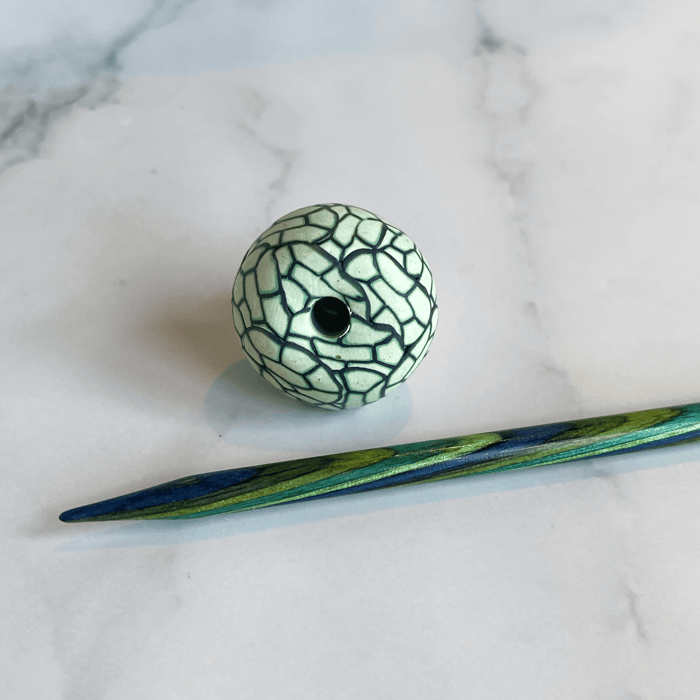
Day 57: Going Big
My first big-holed bead! I used a pretty solo knitting needle that's just slightly larger than my buna cord to create the hole. The bead itself features a lovely pale green base with brighter green edge details over scrap clay. Next challenge: figuring out how to properly attach those little clasps I bought to the buna cord.
Day 58: Carving Success!
Second attempt at carving, and this time I'm getting somewhere! I rolled my black and white layers to #6 on my Atlas pasta machine, which made them much easier to carve while still showing all three distinct layers. The thinner layers definitely make a difference in both workability and final appearance.
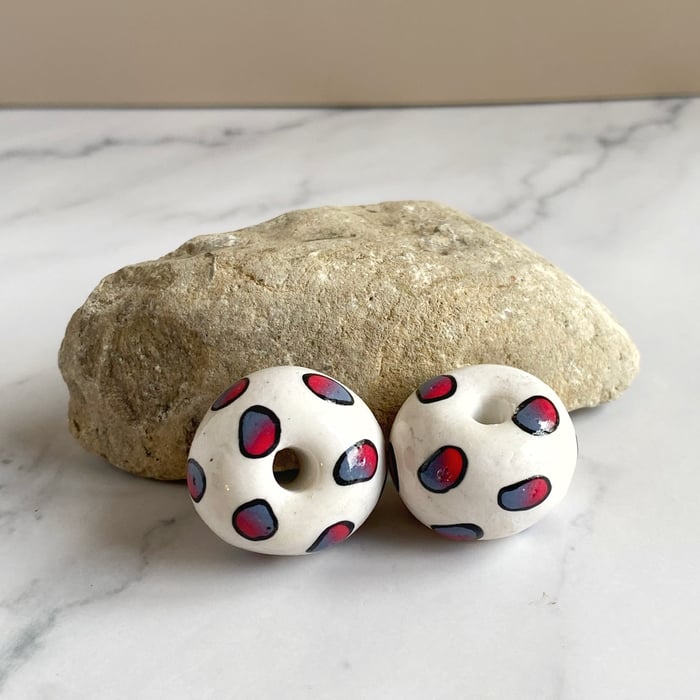
Day 59: Big Holes, Big Charm
Another large-hole bead, this time featuring Skinner blend dots that transition from red to blue, each outlined in black. There's something particularly charming about these larger beads—they have such presence!
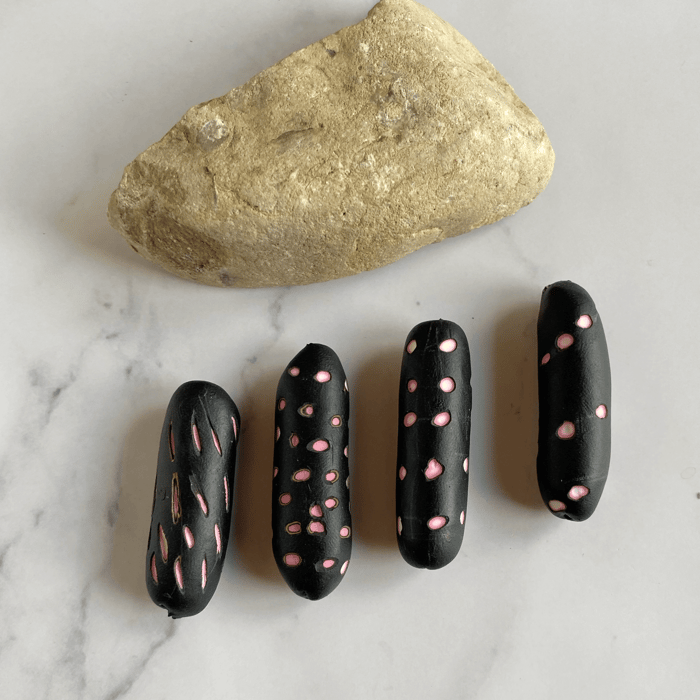
Day 60: Tool Upgrade Time
My third carving experiment brought mixed results. I created cylinder beads with thick white bases topped with thin layers of hot pink and black. While I managed to carve dots and short lines in a semi-regular pattern (from left to right in order of success), I still lack real control with my current tools. I've been using an inexpensive carver from a Christmas kit, but it's time for an upgrade. I've ordered a more professional (and significantly more expensive!) carving tool and can't wait to report back on the difference it makes.
What a marvelous ten days of trials, tribulations, and tiny triumphs! From deer-shaped catastrophes to accidental workshop floor masterpieces, each day brings fresh lessons and delightfully unexpected discoveries. The learning curve is steeper than my grandmother's front steps, but every small success feels like winning the lottery—if the lottery gave out perfectly imperfect polymer clay beads instead of money. Stay tuned for the next thrilling installment of this clay-covered adventure, where I'll undoubtedly find new and creative ways to both succeed brilliantly and fail spectacularly!