If you're like most polymer clay artists, you get so focused on making gorgeous petals for your flowers that you just grab a plain solid color clay for the center. I'm here to tell you there's a simple way to make the center more interesting too!
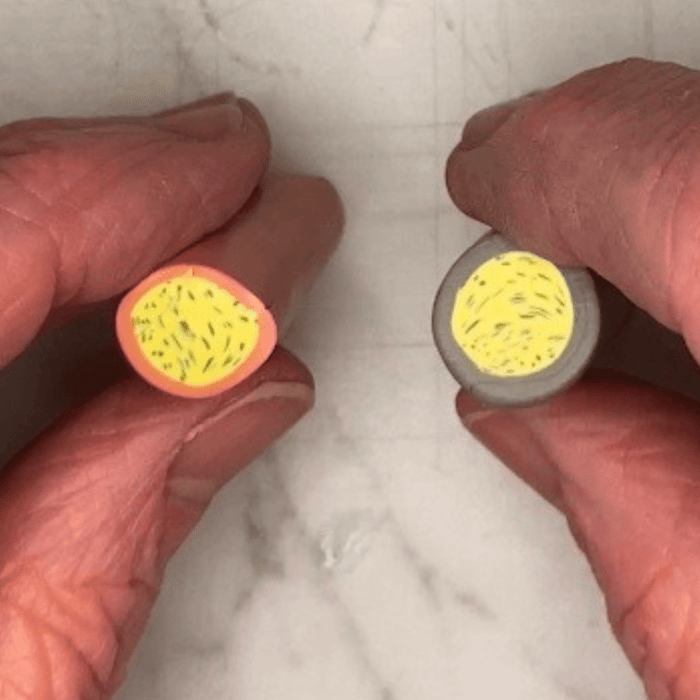
Come along with me to make centers that look like these!
 The center on the left has yellow with dark grey specks, surrounded by a thin copper circle. The center on the right has the same yellow with dark grey specks, but this one is surrounded by a thicker grey circle. These will give different impressions for your flowerl
 Step one is choosing two highly contrasting clay colors. You can choose either the darker or lighter one for the base color.

Roll a medium thin sheet from your base color. Here this is yellow.

Roll very thin polymer clay snakes from your contrasting color. Here this is dark grey.

Drape a couple of the snakes across one end of the base slab.

Fold the un-snaked base over the part with the snakes. You'll continue in this fashion, draping a few snakes, then making an accordion fold in the opposite direction until the yellow is completely folded.

Now smush the accordian-folded clay into a log shape.

When your snake is about 4 inches long, cut it in half.

Here is what the centers look like now. A little more interesting, but not compelling.

Continue rolling the clay into a 4" log, cutting this in half, and rolling the two halves together in a single log. Do this a total of 4 times.
Then squish the final log into a 2" length.

Split your log in half. Make two small slabs to try different outer circles colors and thicknesses.. Here we are using a thinner copper sheet and a thicker dark grey sheet.

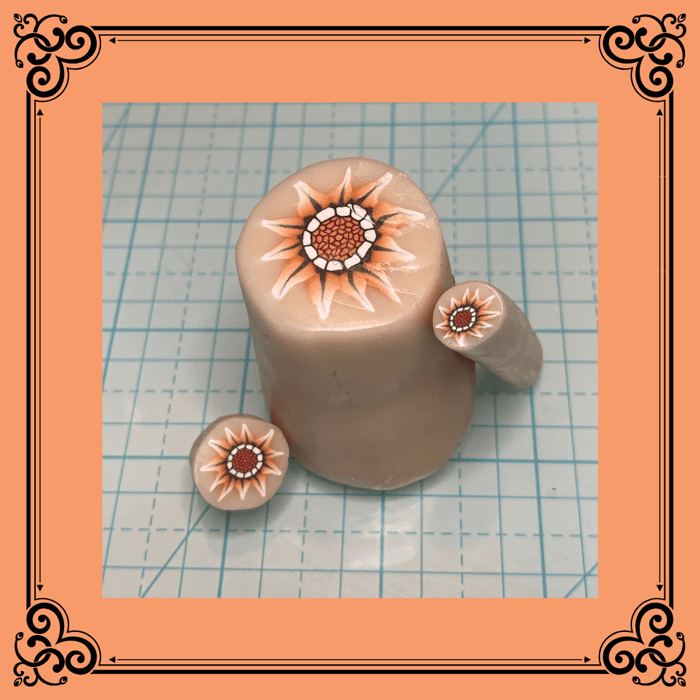
As if making a bull's eye cane, wrap the new sheet around the yellow log. Cut the sheet for an even seam, and trim the ends.

Repeat this process with the other half of your log, wrapping it with your second color, joining the slab ends, and trimming the ends of the log.

And here you've got it: Two interesting centers to use for your fabulous flowers!
I hope your find this simple technique useful. It's amazing what adding a few more details can do for the dramatization of your canes- and I love the way these centers look in my flower canes!
Sign up with your email at the bottom of this page to stay in the loop with PolyClay Emporium. Be the first to know about new Polymer Clay blog posts, exciting sales, and fresh product releases. Our blog is a hub of inspiration, tutorials, and expert tips to enhance your creative process. From beginner to advanced, we've got you covered with the latest trends and techniques in the polymer clay world.
Thank you for being part of the PolyClay Emporium family. We can't wait to inspire your Polymer Clay journey!
Warm Regards,
The PolyClay Emporium Team