 As polymer clay artists, we sometimes find ourselves wanting more color options than the pre-packaged colors: you need a lighter or darker color or one that is a little greener or has a little more yellow. That’s where the magic of polymer clay color mixing comes in. Get ready to dive headfirst into the art of creating exactly the color you need!
While we all remember the basic color combinations we learned in grade school (red and white make pink, blue and yellow make green), polymer clay polymer clay color mixing is a little more complex. In this tutorial, we’ll focus on the art of crafting beautiful shades of pink by experimenting with different ratios or red and white. With each trial, you’ll gain an intuitive sense and the ability to anticipate the results of your color concoctions.
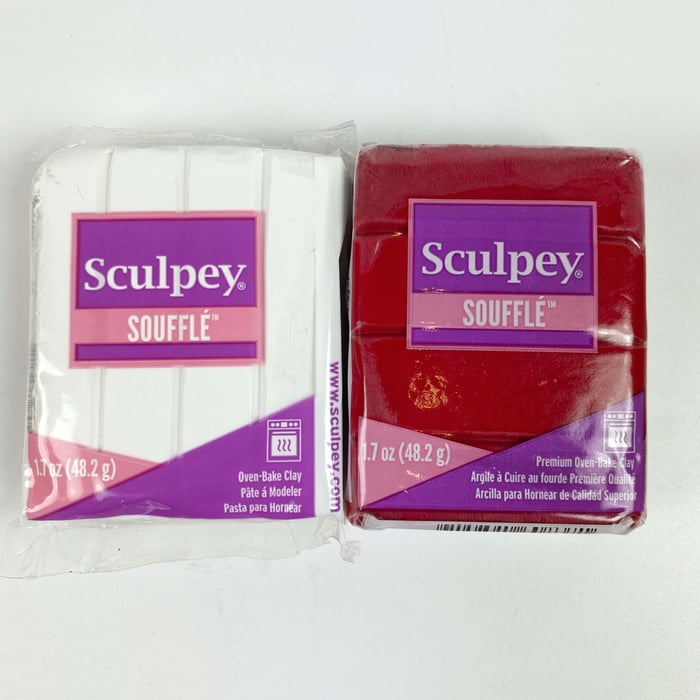
Let’s kickstart our adventure by conditioning the clay we’ll be using. I’ve chosen Sculpey Souffle, specifically Cherry Pie (red) and Igloo (white). Keep in mind that other brands will give you similar colors, but they won’t be precisely the same. Start by conditioning half of a package of white and a quarter of a package of red.

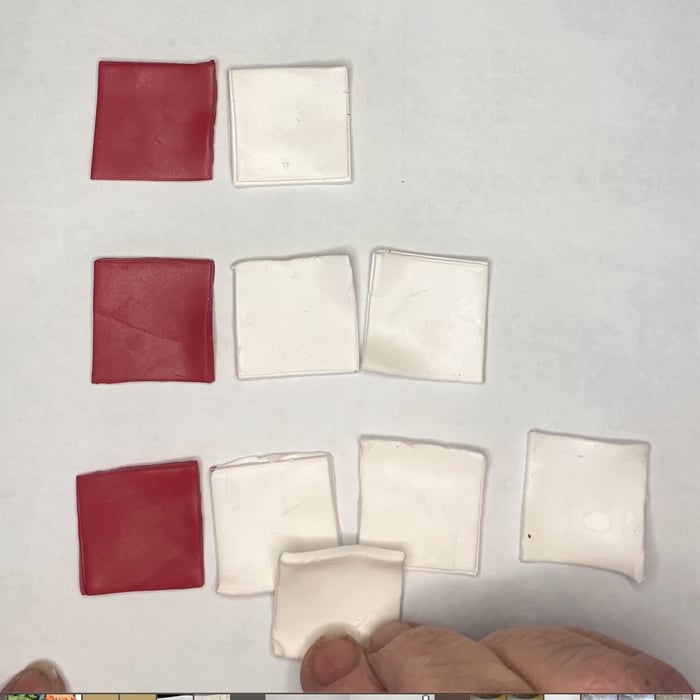
To mix the polymer clay colors systematically, we need to use equivalent parts. Begin by ensuring all your polymer clay is rolled out to the same thickness. If using a pasta machine, opt for the thickest setting. If rolling by hand, aim for a thickness equivalent to about 5 playing cards.
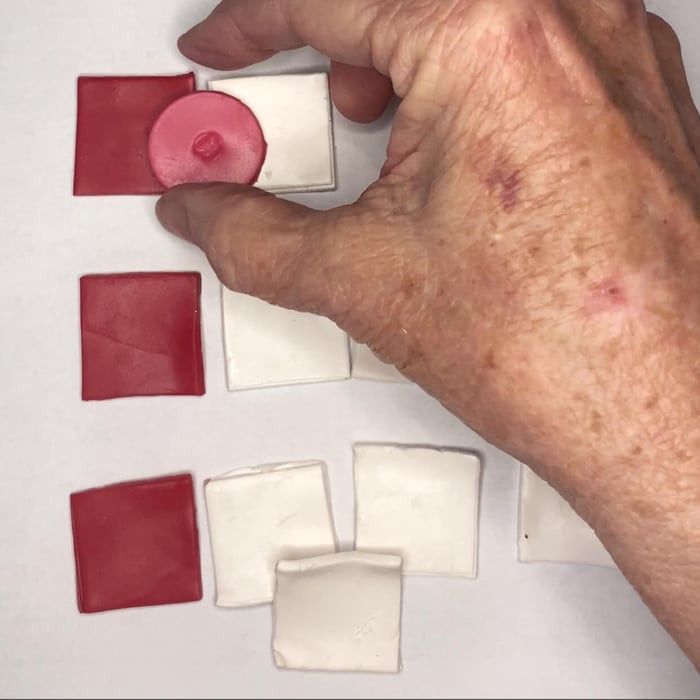
Next, we’ll need qual-sized pieces from each color. For this experiment you can begin with 3 pieces of red and 7 pieces of white. In the accompanying photos, I’ve used 1” squares of clay. This allows for clear color visibility without wasting clay. You can use anything about the same size, as long as you cut all the pieces the same. A circle cutter, or even a fancy shape cutter would work as well.
Arrange your pieces as shown here:
Now take one piece of red and one of white, and mix them together until no color streaks remain. Behold, your first color! Did you expect it to be this rich and dark?
Proceed to the second row, where we’ll mix one red piece with two white pieces. Follow the same process and observe the resulting color- a shade lighter, but still a captivating deep pink.
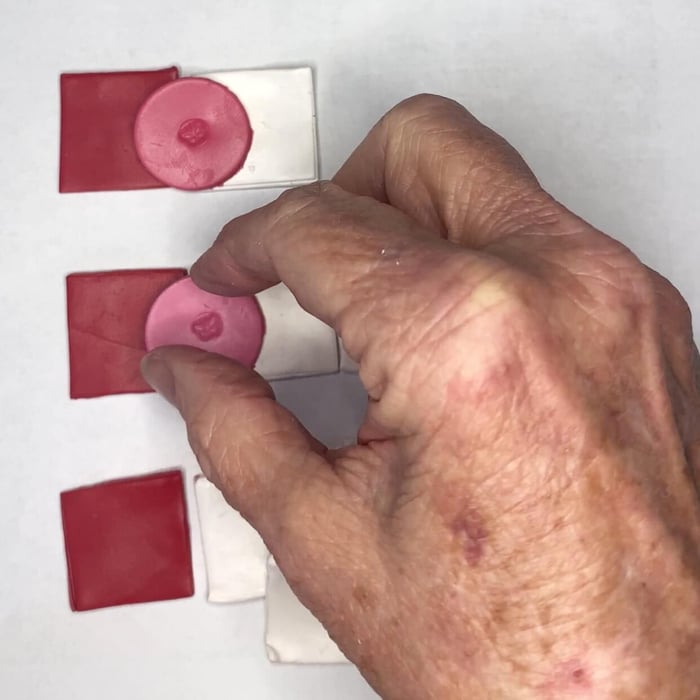
Finally pick up the third row, combining one red piece with 4 red pieces. This mixture will give you an even lighter pink, although it won’t quite reach pastel territory.
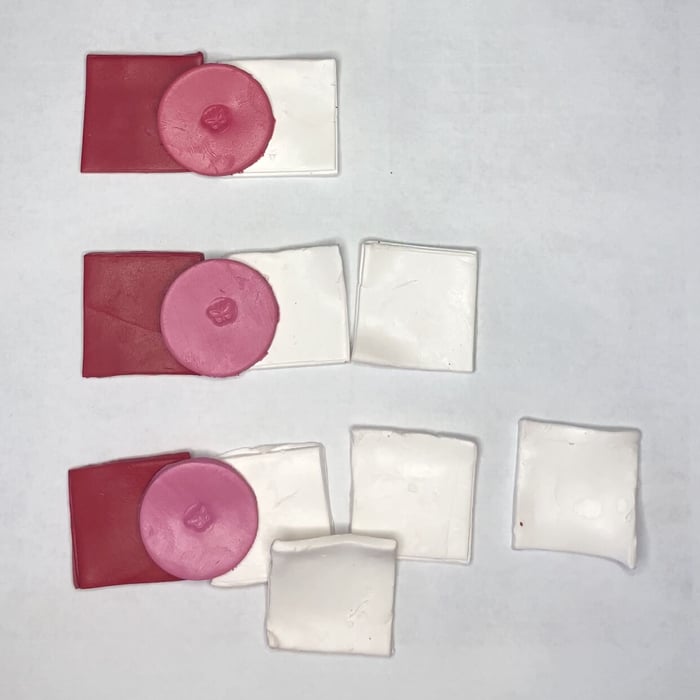

Congratulations! You’ve successfully completed the initial stage of the experiment. Now, it’s up to you whether you’d like to proceed with the second part or simply analyze the color ratios and outcomes. Mixing is undeniably gratifying, but if you’re short on time or polymer clay, fear not! The reading and images alone will provide valuable insights.
You may have noticed that in each of the above colors, we doubled the amount of white polymer clay while keeping the red constant at one piece:
1 red + 1 white
1 red + 2 whites
1 red + 4 whites
In the second half of this experiment, we’ll continue following this pattern:
1 red + 8 white
1 red + 16 whites
1 red + 32 whites
If you’d like to conserve polymer clay, you can halve the amount of red and white required.
1/2 red + 4 white
1/2 red + 8 whites
1/2 red + 16 whites
Here are the delightful shades of pink you can expect from each mix:
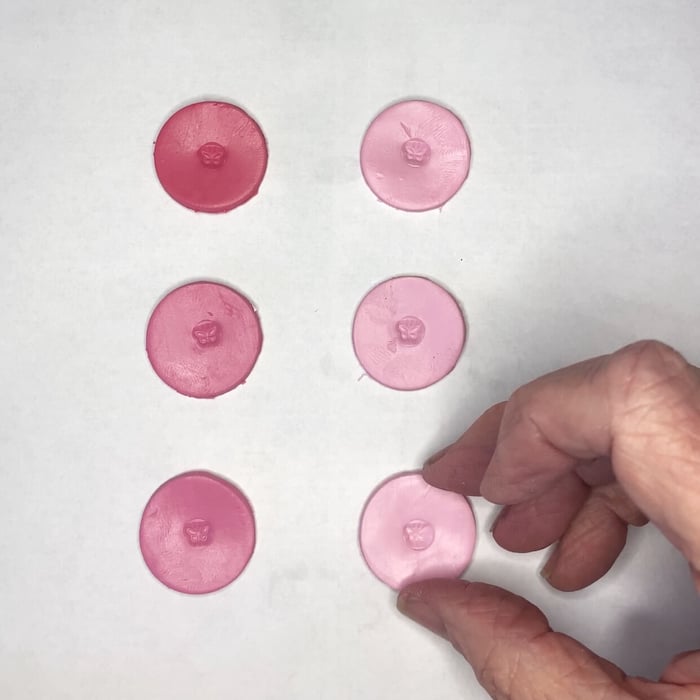
Isn’t it amazing how strong the red color is when it comes to mixing with white polymer clay? It’s truly fascinating to discover just how little red is needed to transform the entire hue. In fact, red proves to be a force to be reckoned with, showcasing its strength and dominance over white.
I hope these experiments have expanded your knowledge of how polymer clay colors harmonize and intertwine. Embark on further explorations using this framework, or better yet, sign up here to receive exciting notifications whenever I unveil a new blog post. Get ready to join me on more captivating experimentation like this.🍭
Sign up with your email at the bottom of this page to stay in the loop with PolyClay Emporium. Be the first to know about new Polymer Clay blog posts, exciting sales, and fresh product releases. Our blog is a hub of inspiration, tutorials, and expert tips to enhance your creative process. From beginner to advanced, we've got you covered with the latest trends and techniques in the polymer clay world.
Thank you for being part of the PolyClay Emporium family. We can't wait to inspire your Polymer Clay journey!
Warm Regards,
The PolyClay Emporium Team